Faulty USB 3.0 Ethernet adapter
I recently ordered some shady cheapo Realtek RTL8153 USB 3.0 GbE adapters for having spare ethernet ports around when I need them.
I ordered from Aliexpress and they arrived within a reasonable amount of time, but there was one problem: while both adapters linked up at 1 Gb/s on the ethernet side, one of them refused to link up at USB 3.0, instead bottlenecking to USB 2.0. This was fully independent of the port, the hub, the machine, other peripherals in use etc. It was always a particular adapter that would be stuck on USB 2.0.
Since USB 3.0 is backwards-compatible with USB 2.0 at the physical layer, adding only two new pairs to its preceding spec, my suspicion was that something was wrong with one or both of the extra pairs. My primary suspicions fell into the following general areas:
- Were the pairs broken inside the cable?
- Was the USB plug constructed incorrectly?
- Was there a lifted wire or dry joint inside the adapter?
The last point was at the top of my list since it's almost certain the soldering of the USB cable onto the PCB is the only bit of soldering carried out by a human rather than a machine.
Partial refund
Since one of the adapters I bought was faulty and didn't meet the product description, I contacted the seller using the Aliexpress messaging feature three times in total, around 1 week apart each. After receiving nothing other than the same canned response encouraging buyers to be patient with shipping, I had to resort to the Aliexpress dispute process to recover the cost of just the faulty adapter. The good news is that once the dispute was lodged, the seller was quick to oblige.
Inspecting the adapter
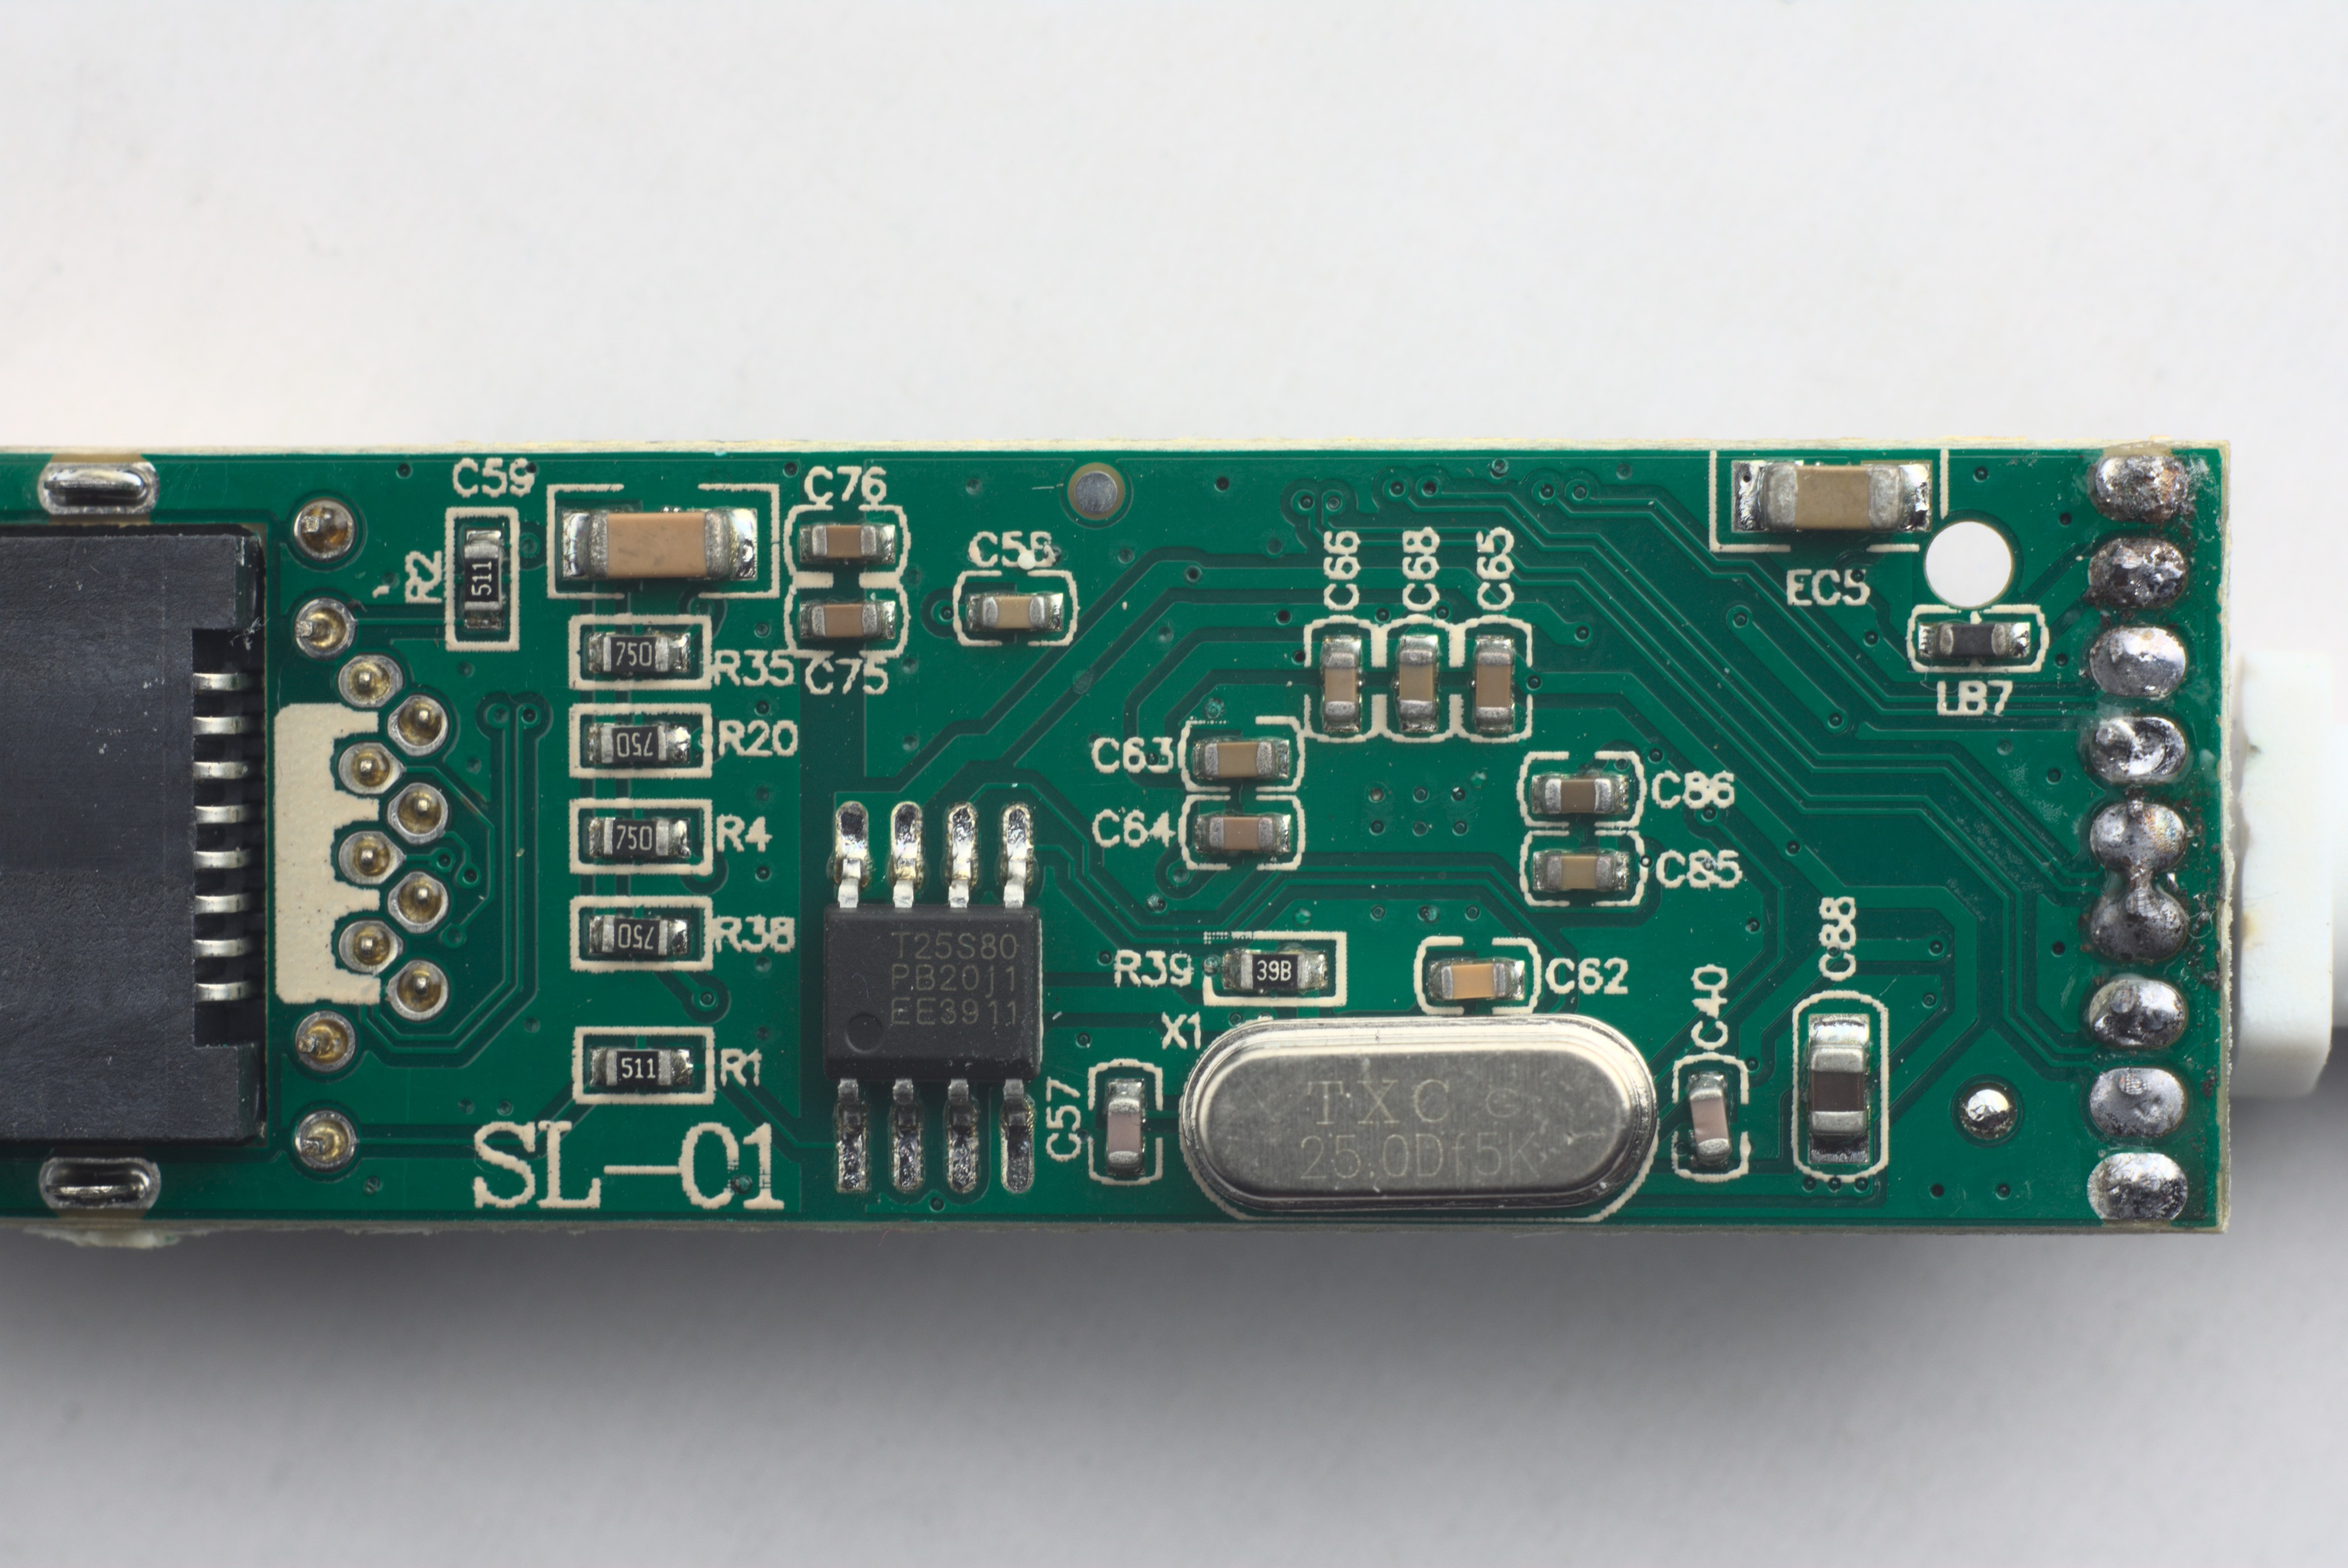
After receiving a refund from the seller for the faulty adapter, I decided to open it up and see if it was salvageable. In most cases, the sleek metal type of adapter can be opened by pushing an ethernet cable into the socket with a bit of pressure, to push the PCB into the plastic cap at the opposite end. With enough force, this will pop out from the aluminium body. The PCB will then slide out.
What I saw was fairly predictable, although not a lifted wire like I had initially thought:
Can you spot it? Here's a closer look at the underside of the USB wire joints:
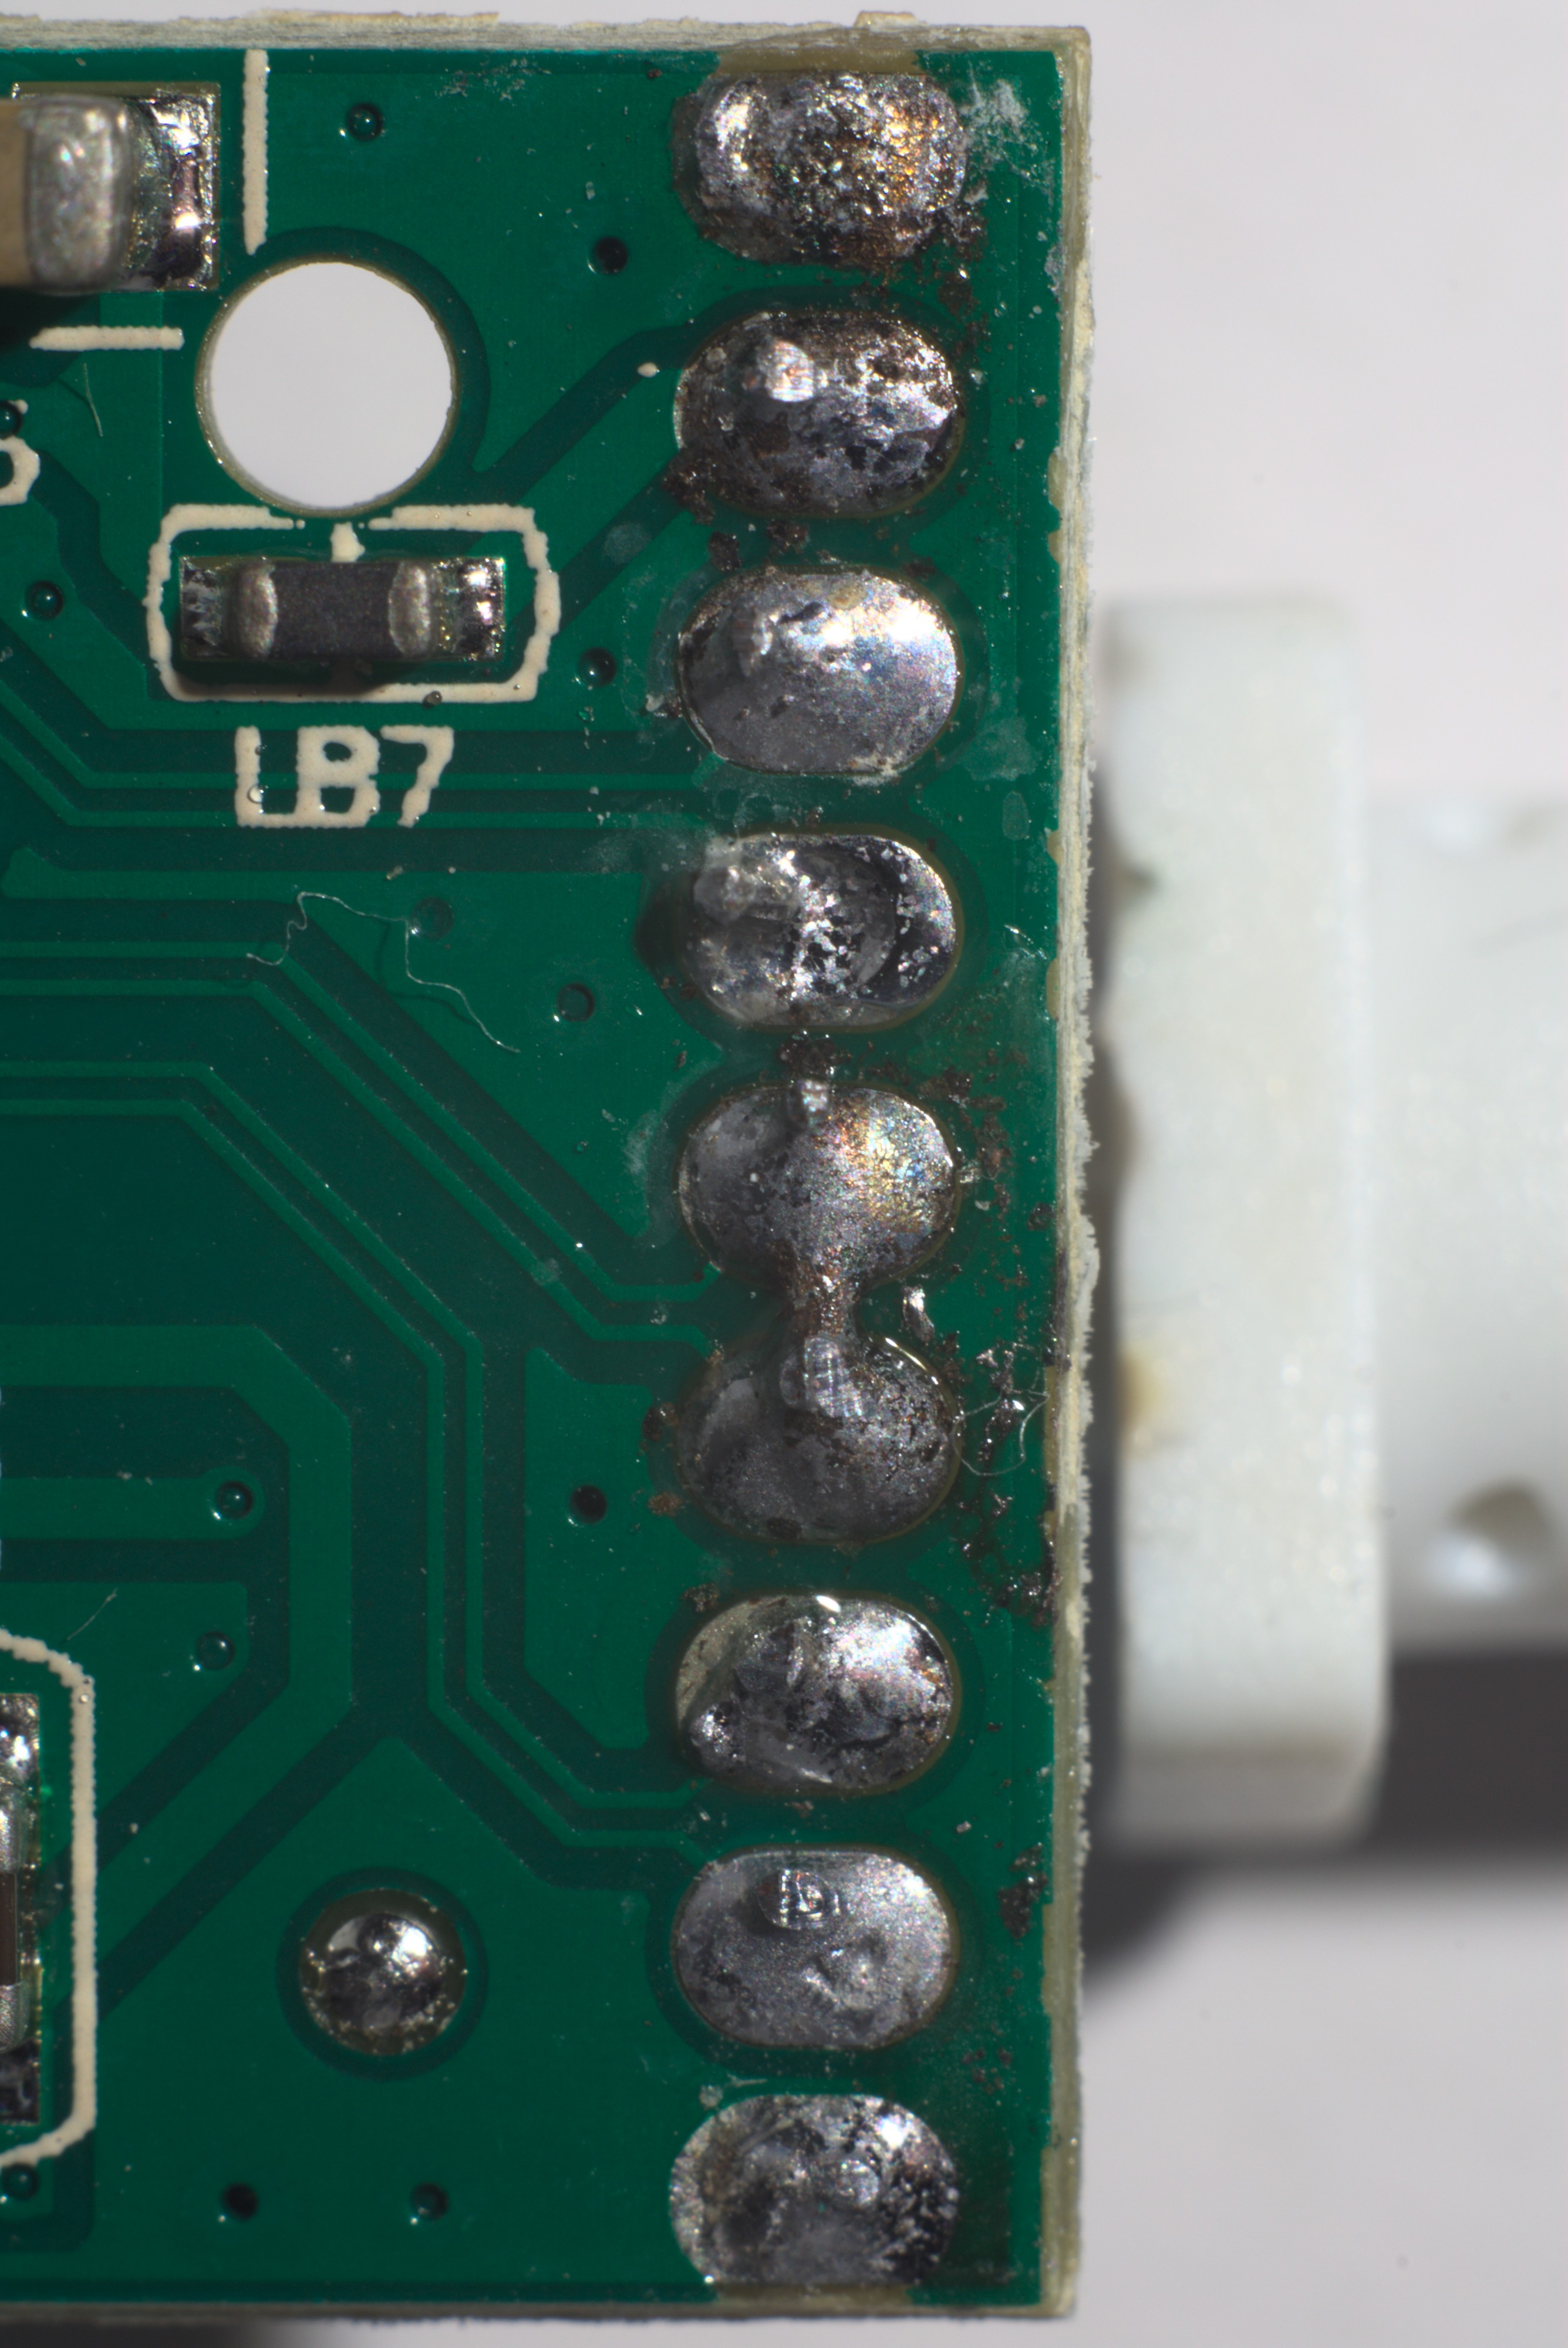
A simple solder bridge between one of the USB 3.0 pairs must have resulted in the USB PHYs at each end of the link being unable to negotiate above USB 2.0 with each other, resulting in the faulty behaviour. What's interesting (though not surprising) is that the most basic form of QA performed on these devices before they get shipped out would have caught this.
The fix
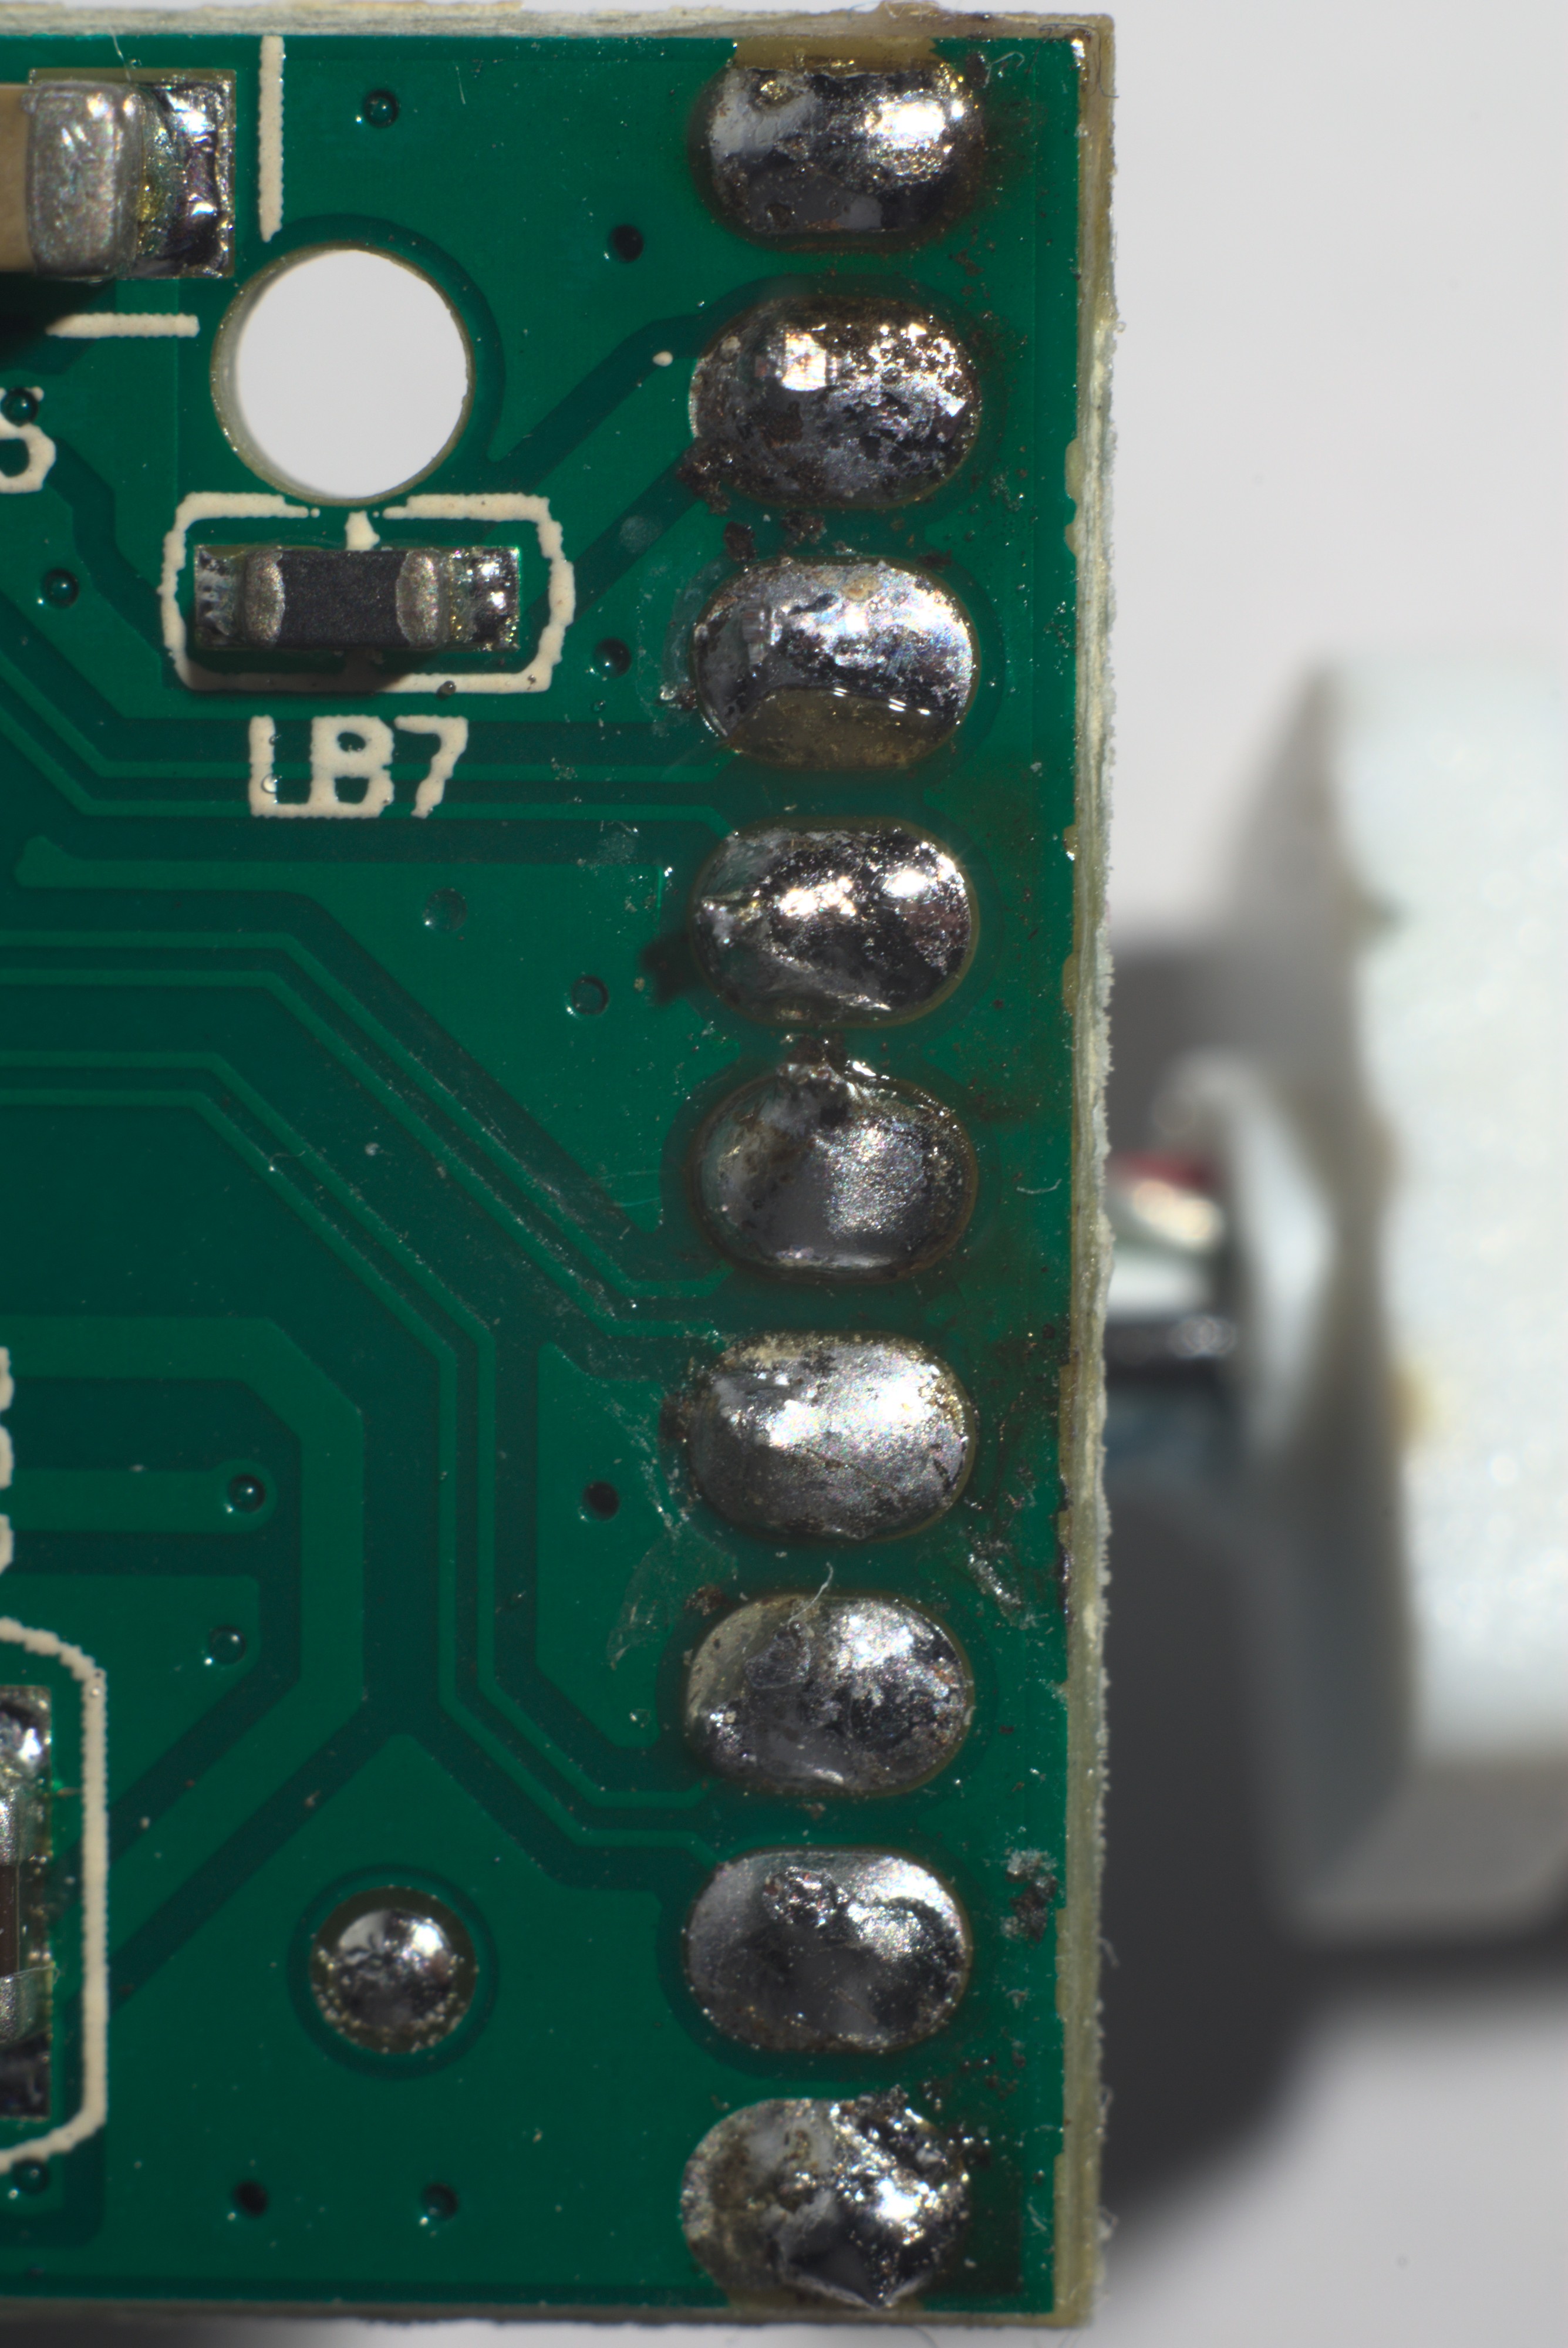
The fix here is just to re-heat the bridge to cause it to reflow and "suck" to either pad of the differential pair it is bridging. While I was in there, I also reflowed a couple of anemic, crusty or otherwise dodgy joints. I had to be careful doing this as the wire insulation is low quality and will melt easily.
Here is the same area after repairing. Not perfect, but I didn't want to reflow too many for too long. Just enough to get it working.
Here is the cropped output of lsusb -t after the repair, showing the device now joins to the SS hub at 5 Gb/s rather than the HS at 480 Mb/s:
/:  Bus 04.Port 1: Dev 1, Class=root_hub, Driver=xhci_hcd/4p, 5000M
    |__ Port 2: Dev 2, If 0, Class=Hub, Driver=hub/4p, 5000M
        |__ Port 1: Dev 3, If 0, Class=Hub, Driver=hub/4p, 5000M
            |__ Port 3: Dev 5, If 0, Class=Vendor Specific Class, Driver=r8152, 5000M
Soak testing
I went on to perform a 1-hour iperf3 soak test. This involves connecting the USB-ethernet adapter up to one of the spare ethernet ports on my workstation (I keep spare Intel 82580 quad GbE cards around). Then, each interface at either end of the link gets put into its own network namespace so that the test traffic cannot take the loopback, i.e. it can only go over the wire to get from one namespace to the other:
ip netns add red
ip netns add blue
ip link set enp3s0f1 mtu 9100 up netns red
ip link set enp4s0u2u1u2 mtu 9100 up netns blue
The links then each have IP addresses on the same subnet configured on them:
ip netns exec red ip a add 192.168.0.1/30 dev enp3s0f1
ip netns exec blue ip a add 192.168.0.2/30 dev enp4s0u2u1u2
In two separate terminals, we can now run an iperf3 server, and a bidirectional client for 3600 seconds (1 hour):
# Terminal 1
ip netns exec red iperf3 -s -i 5

# Terminal 2
ip netns exec blue iperf3 -c 192.168.0.1 --bidir -i 5 -t 3600
Here's the output from my soak test. It's a little asymmetrical, but close enough for cheap adapters that I won't complain.
[ ID][Role] Interval           Transfer     Bitrate         Retr
[  5][RX-S]   0.00—3600.01 sec   409 GBytes   976 Mbits/sec                  receiver
[  8][TX-S]   0.00—3600.01 sec   414 GBytes   988 Mbits/sec    0             sender